Pages

Wednesday, September 28, 2011

Pleated Headband Tutorial


So I seem to be on a headband kick these days....so here is the pleated headband how-to

 First your supplies, you'll need a stretchy headband, felt, fabric of you choice(as you can see i have 3 fabrics pictured i was having a hard time choosing one), and lightweight fusible interfacing.

First you are going to cut out a piece of fabric and interfacing 3"x11.5" iron the
 interfacing to the fabric(not pictured)


Then i ironed over both ends a little and also did a tight zig-zag stich on each end.

 Next i folded it over

And then i started sewing up one short side across the long side and then i left the other short end open so i could turn it right side out.


 Here's how it should look once you turn it right side out and iron it, all nice and pretty :)

After which i eyeballed the pleats(pinning as i went) and then stitched it right down the middle,to hold it together

 Next i cut out a piece of felt and sandwiched the headband between the pleat and the piece of felt and glued it down.

I wanted to dress it up a bit and cut out some red felt hearts for the top that i also glued down

Ta-da! you did it! (at least i hope my instructions made sense!) 

Next find a model to wear your pretty headband- maybe one that can move her left hand really fast!... 

Awww its so easy...especially when i tell her its a princess headband!

I'm going to have to make a couple of these for me!

Don't forget to come back for the headband holder it's going to be AMAZING!!!

Breakfast Cresent Rolls

I tried this recipe i found from this amazing website and i just had to try it! I actually tried it while my husband was out of town and it was ok...but it was a hit with my toddler :) Tonight i decided to try it again because my husband out of the blue became a big cinnamon chip fan....who knew? ...lol anyways without delay here is the amazing breakfast crescent rolls!

Preheat your oven to 350 degrees these are going to bake for 10-12minutes

Three simple ingredients 1) crescent rolls (i was kind of excited to make these again for the hubby that's why the rolls are already open) 2 ) butter.....but not that much  3) Cinnamon chips...as you can tell my husband has been snitching!

First separate and spread out your crescent roll triangles on a greased cookie sheet, then spread a little butter on the top 


Next sprinkle cinnamon chips on top 

Then roll them up placing seam side down,then bake at 350 for 10-12 minutes 


When there done don't forget to sprinkle with powdered sugar -messy but necessary!

Enjoy!

Tuesday, September 27, 2011

Ice Cream

It's that time again! what time you ask?  The make a wish month! and let's be honest the free scoop of ice cream is an added bonus ;) For the first time in maybe 3 years there wasn't line...i was pleasantly surprised!
So did you get your free ice cream today? and donate to a GOOD cause?


Vanilla ice cream, sprinkles and BROWNIE!


CHEESE!....i mean ICE CREAM!!! (she always says cheese when i take a picture of her :) )

What is ice cream if you don't get a little messy?

Help

Ok all you wonderful viewers out there! I need your help....i putting out a call for followers! I know im not the most amazing blogger but that takes time and support so i need you!  and i'd like to do a giveway once i reach 25 followers 50 -100 ....so let's see the followers!

Sunday, September 25, 2011

Who Knew?!

So i really need to blog about this experience because i can't get it off my mind until i do, so here we go one day (probably a month ago)  as i was combing my daughter's hair i noticed that one spot in paticular on the top of her head was very dry - it was like thick layers of dry skin, that would not come out- i shudder even thinking about the feel of it on my fingers. Plus when i tried to pick at it -it only took out hair...i started to panick.what was it? how and why was it there? How could i get it to go away?

 Everyone told me it was dandruff - BUT IT WAS NOT. besides being dry it did not flake, it wasn't red, it was itchy , it didn't even bother her. it was just there annoying me.My only conclusion was that it was cradle's cap, i never knew that a child could get it as a toddler.(?)
 I instantly went online to "google" it and see what i could do and what products to use to get rid of it, and let me tell you i tried everything....from dandruff shampoos to moisturizing to baby products you name it. Nothing worked and it was steady taking over her scalp. I shudder as i think about it.

So one day i ended up taking her to get her hair trimmed and the hairdresser was shocked at what she saw and thought it was dandruff but i told her that it didn't have any signs of dandruff, and that i thought it was cradles cap. So she called her supplier and asked for a cheap way to get rid of it- because i wanted to keep it budget friendly.She came back and said that the supplier had had a similiar experience when her kids were little, and that she used.....Baking Soda!


I was VERY skeptical. But i thought what's the harm? So 3 times a week i mixed warm water and baking soda together and applied it to the dry spots and guess what?! after 3 weeks no more dry scalp! I couldn't be me more happy! One because it's gone two because it only cost me a whole 80 cents!! yahooo!!! So if you ever run into this problem with your toddler - i highly recommend baking soda. Who knew?

Wednesday, September 21, 2011

Fall Fabric Bunting

So lately as I've been browsing the craft world online i seem to come across alot of buntings(banners) - and its driving me insane- what is the big deal with these things?!  So today after seeing the hundredth bunting banner thing i decided to give it a try instead of shooting it down. Might as well give it chance........so here we go...... ready for a picture overload? I don't know what it is when i craft/sew but i just like to take pictures of every step when i do projects no matter how easy it is.


First cut chose some nice fall fabrics....ahh love these color combinations! Oh and also cut out a triangle - as big or small as you please :)

Then start cutting! i wasn't going for any thing that long, also i wanted my bunting to be double sided, so each triangle you see is 2 one on top of another.


Next i sewed the 2 triangles together WRONG sides together i was also wasn't worried about the edges it, it frayed  it would just give it a little more character ;)


I thought i'd class it up a little and cut out the word "fall" in dark brown felt in honor of the season :) I ended up just hot gluing them on.


Here are all the triangles sewn and ready for the next step.....

 I had some Jumbo ric-rac in my stash of ribbon and thought it would be perfect for this banner, so spread it out and lay my triangles halfway up the ric-rac

Then i folded over the ric-rac and pinned where i wanted to sew.

And the rest is history....


Here's another one i made but i also tied some white fabric onto it as well.

I will admit that this picture really doesn't do it justice. This project was so quick and easy to make and i actually really enjoyed making it and i think from now on that before i judge a craft so harshly i will definitely have to give it a try first!

Felt Flower

Are you ready for another cute project? today I'm going to show how to make my favorite felt flower - simple but oh so beautiful!

So let's get started!


First cut out a flower shape that you like out of paper and choose a color of felt that you like, trace 5 flowers out of the felt.

Next cut them out making sure to not leave any pen marks on the flower pieces - i made the mistake of using a black pen- and wished i had used a lighter color.

So out of the flowers you cut out you will use 1 for the base and 4 for the petals.Start by folding flower pieces in half.

As you fold them in half lay them down one by one layering them- as pictured above.

It's kind of hard to see in this picture but put a stitch or two on each petal to hold it down.


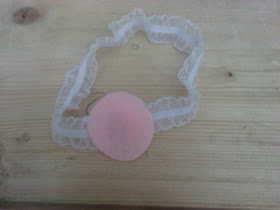
After that you'll want something to put in the center -i chose to glue some pearls in the center. i also decided that i wanted to put this flower on a headband for my daughter so i cut out a felt circle.....

Sewed together the ends of the elastic and glued the felt circle over the seam i had just sewed.

Then i flipped it over and glued the flower to the other side.


Then try it on your little one....

My little one is very girly :)

Ohhhh pretty!! See how simple that was? ADORABLE!!

Thursday, September 15, 2011

The Jewelry Organizer

This project has been calling my name for some time now.....and i finally decided it was time to get it done,plus it would be nice to be able to find my jewelry once and awhile....lol


All you need is a cork board, fabric and a glue gun!


First off i have to brag just a little this board only cost me $3.00!!! What a steal :)


 First lay your board right side up and glue little by little right on that line/crack between the cork and the frame pressing down the fabric into the line/crack. Do this all the way around and be sure to pull the fabric tight, or else you'll get bubbles of fabric.

It should look something like this once you go all the way around -just about halfway done.

Flip the board over to the back and do the same thing as you did on the front pulling the fabric tight.


For the corners i just folded it over as best i could and glued it. Don't worry it doesn't have to be pretty no one's going to see it :)

It will probably will look something like this......


Yay! It's finished!


To hang it my hubby had some of these little life savers hanging around so i nailed this on the back.


Then it's time to hang it on your wall and find all your long lost jewelry! I just used push pins to hang everything. Enjoy!